Published on June 12, 2013
by Thomas C. Van Hare
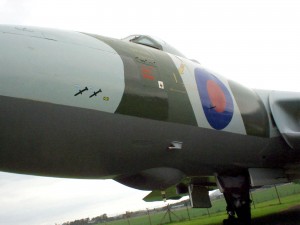
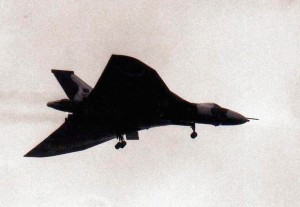
Operation Black Buck 7 was the last of the series flown. Each of the flights had been extraordinarily difficult, logistically nightmarish and only marginally effective. The targets were all Argentinian forces and the missions were flown at the height of the Falklands/Malvinas War. Each of the Black Bucks was completed by a single Avro Vulcan bomber, a plane that was designed for the Cold War and a mission of nuclear bombs destined for the heart of the Soviet Union. That was a mission, however, that it had never flown — instead, the Vulcan capped its career with a completely different operation, carrying regular iron bombs and AGM-45 Shrike missiles in a conventional war half a world away from the Cold War and Europe, in the freezing cold of the South Atlantic in winter.
Certainly, the missions, code-named Operation Black Buck, were a matter of national pride. Certainly, they sent a message to the Argentinian forces that Britain had the power to project force globally. Certainly, they were an apt reminder of the strength of the Royal Air Force. Yet just what had Operation Black Buck accomplished and — ultimately — just what was the full story and purpose, one that was hidden from the public at the time?
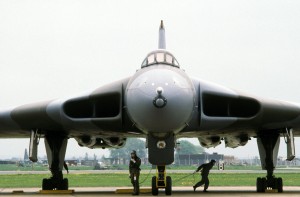
The Avro Vulcan
The Vulcan bomber was the crowning achievement of Britain’s nuclear bomber force. Developed in the 1950s, it was a radical design that featured a huge delta wing, giving it immense lifting potential and excellent range at altitude. At the time of its development, during the competition for the RAF’s Specification B.35/46, which detailed the “V Bomber” requirement, it was also the most daring of the submissions. The requirements were simple — the ability to lift a nuclear weapon, fly long distances at high altitude and reliably deliver them on East Bloc targets. By the early 1970s, however, the emergence of highly accurate and capable surface to air missiles (SAMs) meant that the era of the high altitude bomber had come nearly to an end. By 1982, the Vulcan was coming up on 30 years old with the start of the Falklands/Malvinas War (both the British Argentine names for the disputed islands are used so as to properly reflect the international readership of this magazine).
The Royal Air Force — and indeed all of Britain’s military — were undergoing significant cuts at the time. The RAF seized on the opportunity to demonstrate to the world that it still had teeth. Thus, a handful of the best remaining Vulcan bombers were deployed to RAF Ascension, known as Wideawake Airfield in common parlance. Ascension was in the middle of the Atlantic, not far from the equator. The intended Argentine targets in the Falklands/Malvinas Islands were 6,300 km distant, meaning that the aircraft would have to fly a 12,600 km round trip mission to drop its bombs. At the time, the RAF released to the public that this had required multiple en route refueling operations for each flight. That was an understatement, however.
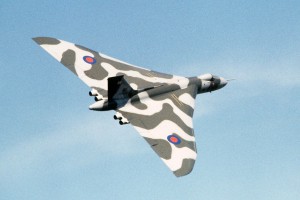
Global Power Projection has Limits
Indeed, the key challenge of Operation Black Buck had to do with the aerial refueling requirements. Yet even before that challenge could be addressed, first, the Avro Vulcans had to be selected and brought up to specification for the mission. Three of the best, modernized Vulcans equipped with Bristol Olympus 301 jet engines were drawn for the mission — these were taken one each from RAF 44, 50 and 101 Squadrons. As well, Inertial Navigation Systems (INS) were hastily installed to allow precision navigation to and from the target — two tiny sets of islands more than 8 hours flight time apart. ECM was added to counter Argentina’s known air defense threats — these systems, known as the Dash 10, were “borrowed” from a squadron of Blackburn Buccaneers based at RAF Honington and fitted under the wings on improvised pylons. Then weapons were selected — the aforementioned AGM-45 Shrike missiles which homed in on enemy radar transmitters and allowed for SAM suppression and destruction of Argentina’s early warning radar nets; as well as conventional bomb loads which featured options for low altitude delivery and timed fuses.
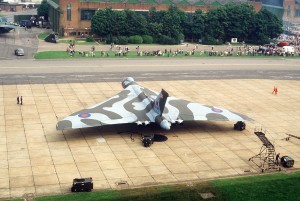
Several crews were selected, though it was realized early on that they had not been exercising their refueling systems for some time prior to the war. The systems were blocked off for safety reasons. Refueling experience was limited as a result. Therefore, the system was unblocked, tested and brought back into service in record time and the crews underwent a refresher course on refueling strategies. Training in INS navigation, tactics for penetrating Argentina’s air defense networks and weapons delivery refreshers were hurriedly undertaken. With that, the bombers were ready for war, though, as it would turn out, that was only part of the equation. By April 18, 1982, the three Vulcans had arrived at RAF Ascension.
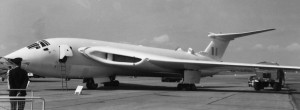
Next up were selecting and deploying the aircraft for the aerial refueling support. At the time, Britain’s RAF had limited air-to-air refueling capabilities, particularly for strategic use. While the RAF had earlier flown most long range Vulcan missions across the Atlantic, picking up a refueling plane after take off and then possibly over the North Atlantic while on the way, the mission from Ascension to the Falklands/Malvinas was another story entirely. Multiple refueling join-ups would be required. What was more troublesome was that the RAF’s main aerial refueling plane, the Handley Page Victor tanker, did not have the range to properly support the mission. One advantage of the Victor, however, was that it could itself refuel from another Victor, thereby extending its range via a relay strategy as tankers handed off fuel to other tankers as they extended outward.
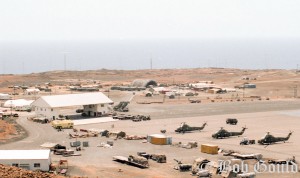
Achieving “Mission Impossible”
As it was, each of the seven Operation Black Buck missions — numbered 1 through 7 — required a veritable fleet of tankers to complete. Even if the Vulcan bomber would refuel seven times during its 16 hour round trip, due to the extreme range at which these aerial refuelings were to take place, multiple Victors would have to fly, refueling one another even more times than that to allow support for the bomber throughout its mission. Additional Handley Page Victors would have to be flown as standby refuelers in case one of the other aircraft had a malfunction or failure. It was a complex and challenging mission profile. Finally, given the maintenance record of the Avro Vulcan itself, on each mission, two aircraft with identical armament would be flown — thus, if the primary aircraft suffered a mechanical problem, the stand-by aircraft could continue. Likewise, if the primary aircraft did not suffer any problems, then the standby aircraft could return to base. However, the standby aircraft would have to be itself refueled along the way, which necessitated even more tankers.
Ultimately, each of the Black Buck missions required two Avro Vulcans and eleven Handley Page Victors in three waves. In all, 220,000 gallons of jet fuel were required for the single operational attack. Each Vulcan, however, could deliver 21 each of the 1,000 pound bombs on the target, which was certainly an incredibly powerful attack. To get there, however, was… incredible.
The Refueling Circus
For each mission flown, three waves of aircraft would depart the return. Wave one would start with two Vulcans and four Victors. These took off and headed south-southeast from RAF Ascension. One of the Victors would refuel the primary Vulcan twice as it flew outbound before it would return to base, leaving the Vulcan to continue. A second Victor would proceed on — and fly nearly all the way to the target area, which it could do because it was itself refueled by a third Victor, which would then return to base. The reserve Vulcan bomber, accompanied by a reserve fourth Victor tanker would return to base if the primary Vulcan continued in good order and none of the Victor refueling planes had a significant problem.
Meanwhile, a second wave of seven Victors would launch to follow the Vulcan bomber southward. The first Victor of the second wave would fly to the extent of its range before being refueled by a second Victor, which would then return to RAF Ascension. That first Victor would then join up with the Vulcan and refuel it twice more before it would refuel a third Victor, which in turn had made it that far because it had been earlier refueled by a fourth Victor. Both the first Victor and the fourth Victor would then would return to RAF Ascension. Before turning back to RAF Ascension, the third Victor would then refuel a fifth Victor, which had only made it that far because it had been refueled earlier by a sixth Victor that had long since returned to RAF Ascension. The fifth Victor would then refuel the Vulcan twice more before it finally returned to RAF Ascension. The Vulcan bomber, by then, would have nearly reached the target.
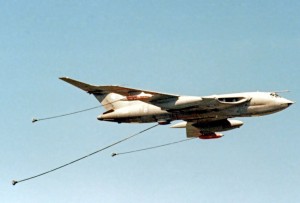
The Vulcan would then bomb the targets on the Falklands/Malvinas Islands before turning back northward. It would then refuel from the second Victor that had come out as part of the first wave, which would then return to RAF Ascension. At this point, the Vulcan would still need one more refueling on the way back. To ensure that this happened, a third wave of refueling planes would be deployed earlier, so as to meet up with the Vulcan as it came back northward. Two Victors would have to be flown far to the south for that refueling requirement — one as the primary and one as a reserve. Each of these would in turn have to be refueled by another Victor each to make it that far south. Thus, the third wave had four Victors departing RAF Ascension. The Vulcan would do its final refueling and finally, all of the planes would recover to RAF Ascension.
To be successful, pinpoint navigation, well-timed aerial rendezvous and flawless refueling would have to be performed throughout. Reserve aircraft were always present in the event that something went wrong — yet the simple fact that the entire flight would be over open ocean, without any landing fields en route, was a serious challenge. If something went wrong, there was always a possibility to turn west and land in Brazil, though that wasn’t a favored option given Brazil’s generally positive relations with Argentina.
The Missions
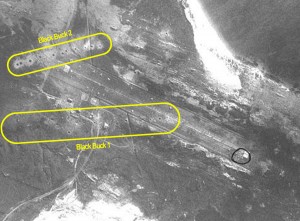
As it happened, of the seven missions, only five were successfully completed. Maintenance issues and failures in the refueling circus plan caused multiple issues throughout the operation. Black Buck 1, for instance, suffered a pressurization failure with the primary Vulcan, though the mission was completed by the reserve Vulcan bomber. One of the Victors had to turn back too and it was replaced by one of the reserve tankers. This surprise mission put 21 bombs into the vicinity of the Port Stanley Airfield, successfully holing the runway and disallowing its use by heavy jet fighters and transports for the rest of the war.
Operation Black Buck 2 was nearly flawless except that the bombs targeting the end of the same runway missed, if only barely, reportedly due to evasive action taken as a result of a SAM threat. Black Buck 3 was cancelled due to high winds at Ascension. Black Buck 4 flew out five hours before the key outbound refueling Victor suffered a refueling system failure, which forced the cancellation of the mission. Black Buck 5 was a Shrike mission targeted against a long range early warning radar system and it was flown successfully. The targeted radar system was only damaged, however, and subsequently repaired so as to remain in service for the rest of the war.
Black Buck 6, however, was something of a disaster and it triggered an international incident. The mission was successful in reaching the target and the Vulcan bomber fired a Shrike at a SAM site, destroying it. On the return, however, the Vulcan’s own refueling system failed. Despite the presence of waiting Victor tankers, the Vulcan crew had no choice but to turn west to Brazil. After landing at Galeão Air Force Base, near Rio de Janiero, the Vulcan bomber and crew were held for nine days until the diplomatic aspects of the mission were resolved and the plane and flight crew released, having been treated well by the Brazilian military. By then, the war was over.
The final Black Buck mission, number 7, was flown nearly flawlessly today in aviation history — on June 12, 1982. With victory in the conflict almost at hand, the mission was supposed to drop conventional bombs set to air burst above the runway at Port Stanley and thereby destroy materiel and ammunition stored at the field. Instead, however, the fuses were improperly set and the runway was significantly holed — an undesirable outcome as the RAF had plans to use the runway once the Argentinians surrenders. As well, some bombs were dropped on Argentine troop positions, which no doubt hastened the surrender that took place just two days later.
Aftermath
Operation Black Buck was not only the longest range aerial bombing mission ever flown as of that date, it was also the most impractical. The hours put on the airframes — particularly the Victor tanker fleet — were extensive. This brought the Victor tanker fleet to an early retirement. Without replacements available for at least another two years, the RAF was left short of tankers. The Vulcans, concurrently, were retiring that very year after the end of the war. The solution was simple — rather than retire all of the Vulcans, six would be converted to tankers. This gave rise to the Vulcan K.2 modification that included the Mark 17 Hose Drum Unit (HDU) in the fuselage. Weirdly, the very planes that had created the “tanker gap” were the ones drafted into fixing it.
Damage caused by the Black Buck missions was nominal at best, despite the extraordinary effort required. Certainly, taking out the Port Stanley Airfield forced Argentina to launch attacks on the Royal Navy fleet from the mainland, which was a strategic victory. Yet perhaps the greatest impact was political. For Argentina, the confidence that they were out of reach of the RAF’s long arm was seriously shaken. There were limits to what they could do — and it didn’t take a genius level politician to recognize that Britain was restricting its attacks on the Falklands/Malvinas Islands alone — though the RAF could just as easily dropped 21 of the powerful 1,000 pound bombs on downtown Buenos Aires. The final impact of Operation Black Buck was budgetary — though the costs of the missions were high in materiel, even stressing the Victor tanker fleet beyond its capabilities and leaving a “tanker gap” in the wake of the war, the missions had demonstrated that the RAF deserved its fair budgetary share.
And thus, the Falklands/Malvinas War played out as a victory on a very distant battlefield — indeed, it was the RAF, above all, that won the budgetary battle in the Houses of Parliament in London. That the venerable Vulcan bomber had achieved that, more than the extraordinarily long range Black Buck missions themselves, was the true “Mission Impossible” of the day.

Ohhh!! My brain hurts!
I understand Port Stanley Airfield was not taken out as an Argentinian C-130 landed there shortly after the bombing.
As for the RAF dropping bombs on Buenos Aires, the British government rejected that possibility even before sailing out to the islands as it would have been a PR nightmare for the British.
By the way, there is a nice video of Black Buck Operation on YouTube.
As a side note, I was a child living in Venezuela at the time and being an aviation buff myself I was quite interested on the topic. I still have newspapers articles depicting Skyhawks, Harriers, and Super Etendards.
Mauro —
Thanks for the post — yes, the British government rejected the idea of attacking Buenos Aires, but the political impact of the Black Buck missions was evident in any case. Anyone in politics — on both sides — recognized that conflict would be best limited to the islands, though it also made clear that the costs of escalation would be one-sided. The RAF could strike anywhere in Argentina, while Britain was far beyond the reach of the Argentinians. Thus, it was defined as a “limited conflict” by both sides and Argentina, far more than Britain, felt the shadow of fear that quietly whispered that those limits would have to be respected.
The YouTube video — a very long, well-researched documentary — is at:
Thomas.
Thomas,
I agree with you that UK was beyond the reach of Argentina’s military, however, bombs falling on the South American continent would have brought serious diplomatic reprecussions. It is worth noting that Chile was the only South American country that sided with the UK.
One remarkable aspect of this war was the absence of airborne early warning and command/control platforms (such as AWACS) on both sides, though Argentina had a ground-based long range EWR and the British Naval ships had their radar systems.
Mauro